
The 4th of July is just around the corner, and what better way to celebrate than by showing off your festive spirit with some amazing nail art?
From bold red and white stripes to intricate star designs, there’s a world of creativity waiting at your fingertips.
These 25 patriotic nail art ideas will not only make you stand out at barbecues and fireworks displays, but they’ll also let you express your love for your country in a fun and artistic way! Get ready to wow your friends and family with your nail game this Independence Day!
Contents
- 1. Classic Red, White, and Blue Stripes
- 2. Starry Night Sky
- 3. Fireworks Explosion
- 4. Patriotic Gradient
- 5. Stars and Stripes Combo
- 6. Glittering Flag
- 7. Abstract Firework Splatter
- 8. Stars on a Blue Field
- 9. Red and Blue Dots
- 10. American Spirit with Rhinestones
- 11. Watercolor Stars
- 12. Tie-Dye Patriot
- 13. Minimalist Flag Lines
- 14. Bold and Bright Stars
- 15. Independence Day Characters
- 16. Red and White Marble
- 17. Funky Geometric Patterns
- 18. Sunshine and Fireworks
- 19. Bold Tribal Patterns
- 20. Seasonal Flowers
- 21. Spangled Glitter Accent
- 22. Twinkling Stars and Stripes
- 23. Neon Patriotic
- 24. Iconic Eagle Design
- 25. Minimalist Red, White, and Blue
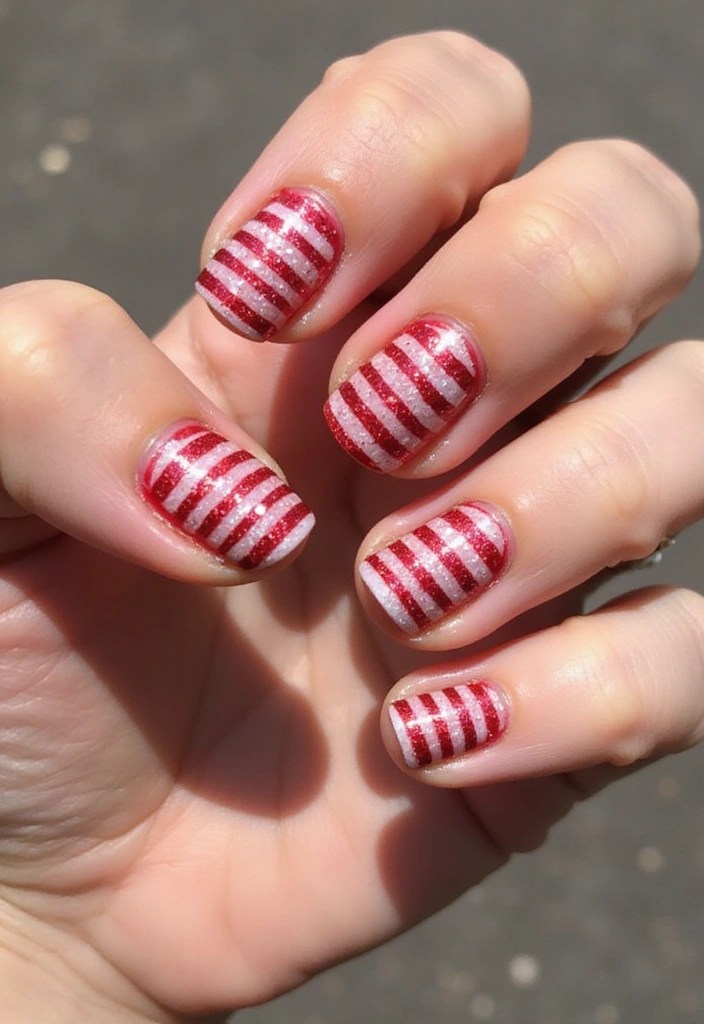
1. Classic Red, White, and Blue Stripes
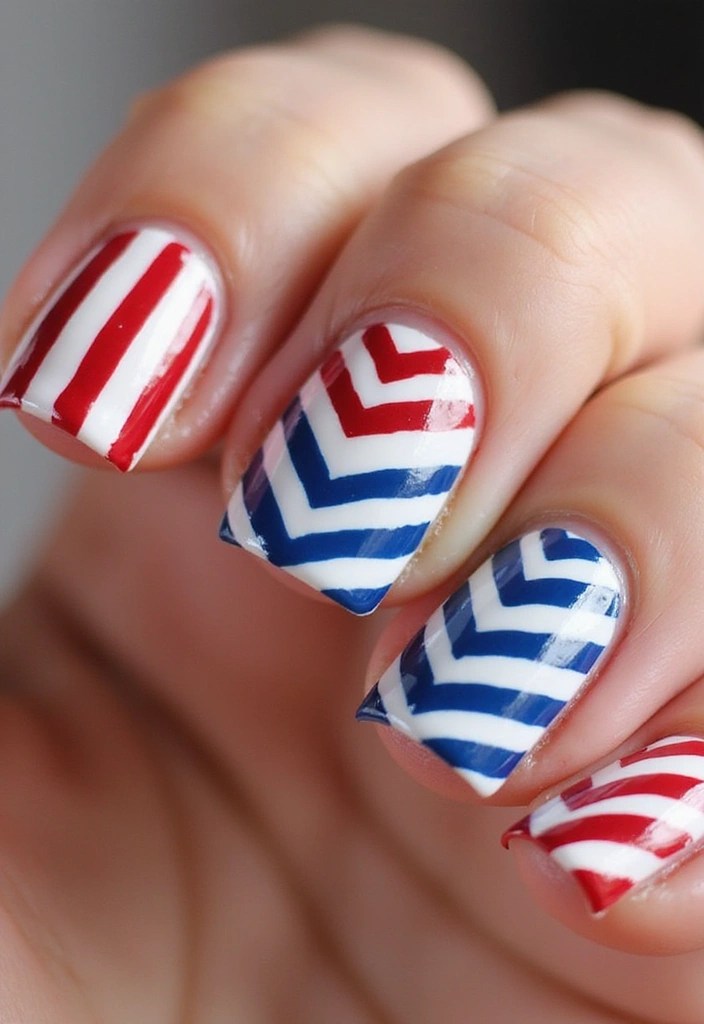
Start your patriotic nail journey with the timeless appeal of red, white, and blue stripes! This design is a classic, featuring alternating stripes that give your nails a bold and festive look. You can paint all your nails the same or mix it up by alternating colors on different fingers.
To achieve this look, consider using nail striping tape for straight lines, which makes it easy to get crisp edges. If you prefer a more relaxed vibe, you can freehand your stripes. Just remember to let each color dry before applying the next one for the best results!
Once you have your stripes in place, adding a glossy top coat can enhance the vibrancy of the colors and give your nails a shiny finish. This top coat is quick drying and chip resistant, ensuring your patriotic look lasts throughout your celebrations.
For an extra touch of sparkle, consider finishing your design with glitter nail polish. A little glitter can elevate your nail art, adding that festive flair that will make you shine wherever you go!
– Use scotch tape or a nail striping tool for precision.
– Mix textures: matte blue with glossy red stripes for a fun contrast.
– Consider a glittery top coat for an extra sparkle!
2. Starry Night Sky
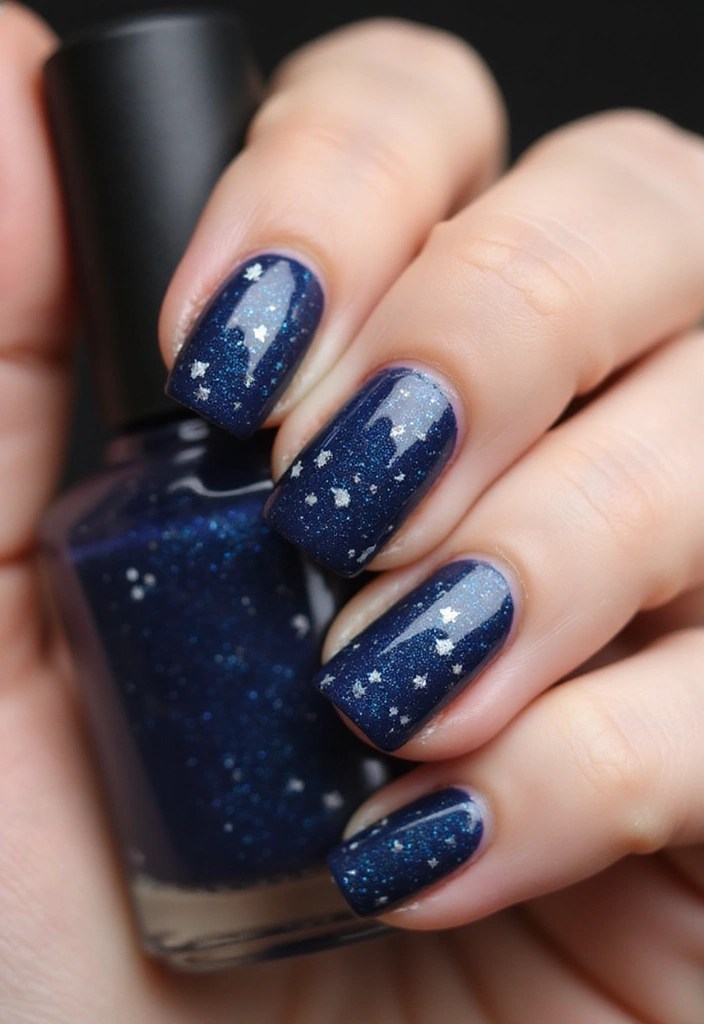
Bring a touch of the night sky to your nails with a starry design that’s perfect for July 4th! Start by painting your nails navy blue or black to create a beautiful canvas. To add the white stars, consider using a nail art dotting tools set, which will allow you to create perfect star shapes with precision. If you want to add some sparkle, incorporate a few glittery stars using the L.a. COLORS Color Craze Nail Polish, Glitter Bomb CNP543, available for just $0.98. This glitter nail polish will provide that extra shimmer for a dazzling effect.
For those who appreciate a little guidance while creating their nail art, using star nail art stencils can help ensure uniformity in your design. These stencils are particularly useful if you’re not confident in your freehand skills.
To add depth and interest, think about including a shooting star or two with gold or silver glitter polish. Mixing in tiny rhinestones will also elevate the festive feel of your manicure. Finally, consider finishing off your design with a matte topcoat for a smooth, sophisticated look. This starry night sky design will not only celebrate Independence Day but also give you a whimsical touch to your nails!
3. Fireworks Explosion
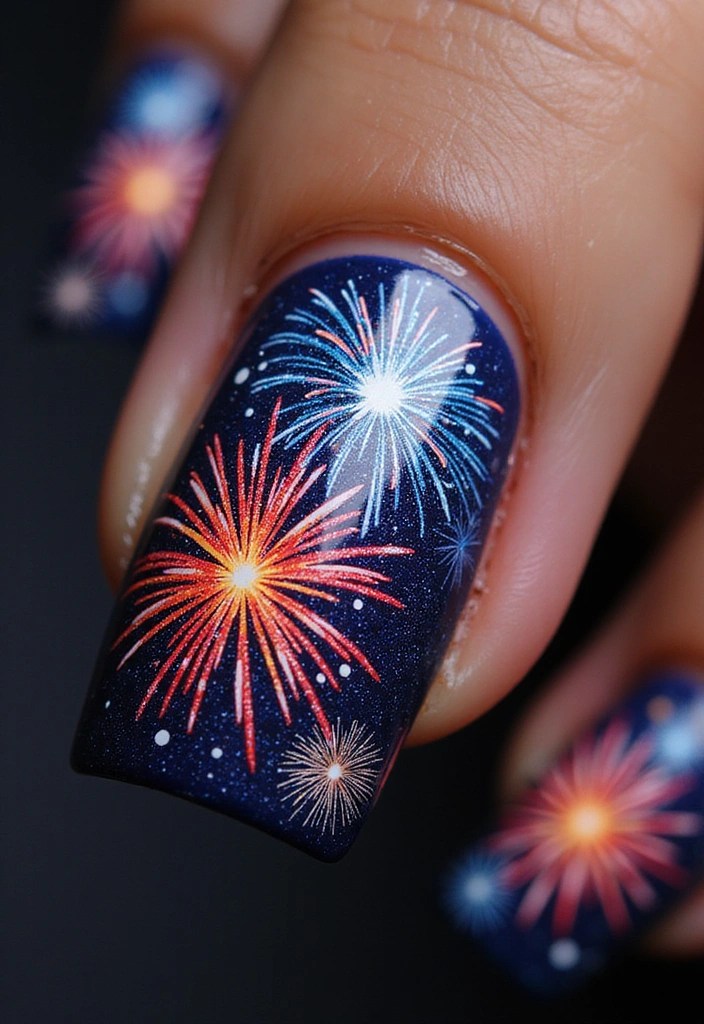
What’s more festive than fireworks on the 4th of July? Why not wear them on your nails?
Create a bright and colorful fireworks explosion by using a variety of nail polish colors. Choose vibrant yellows, reds, and blues for the fireworks, letting them pop against a dark background. For this, you can use the Morovan neon nail polish set, which includes 15 vibrant colors perfect for this lively design.
To create a fireworks effect, use a fan brush or a fine art brush to apply the colors in bursts and lines. A great option for this is the Nail art brush set, which provides various tools to help you achieve that perfect burst of color. Finish off with a clear topcoat to smooth everything out.
If you want to simplify things, try using a sponge to dab colors onto your nails for a more abstract fireworks look. Blend colors gently for a more realistic effect and consider incorporating rhinestones to represent the fireworks bursting. For this, you can use rhinestones for nail art with strong glue, ensuring they stay in place as you celebrate. Finally, add a clear coat with a touch of sparkle to mimic the shimmering effect of fireworks.
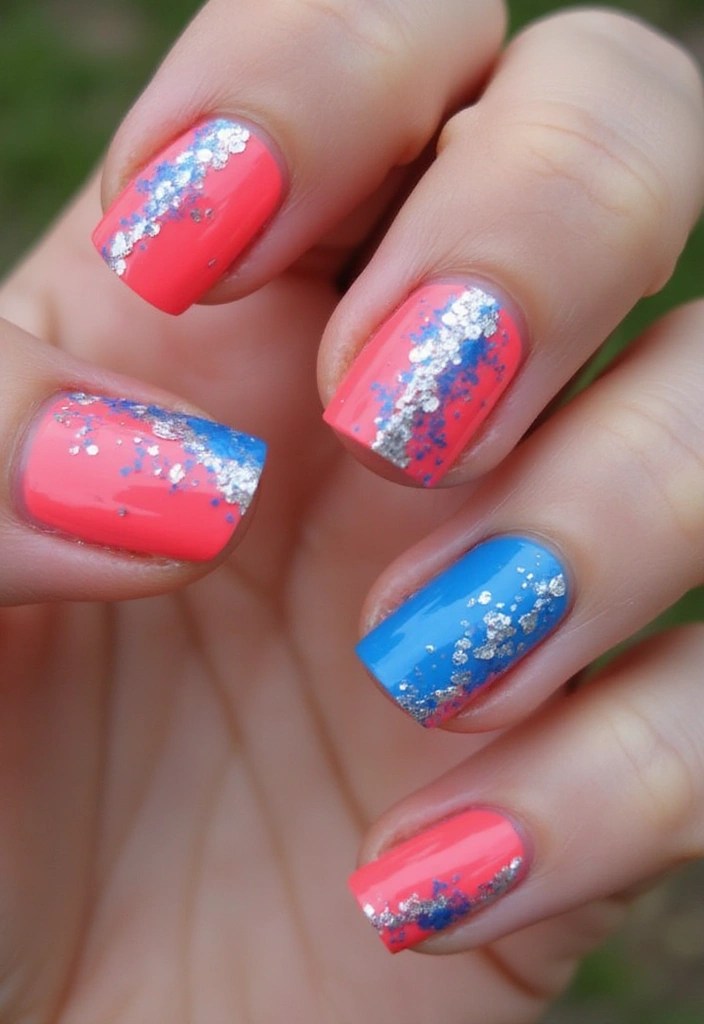
4. Patriotic Gradient
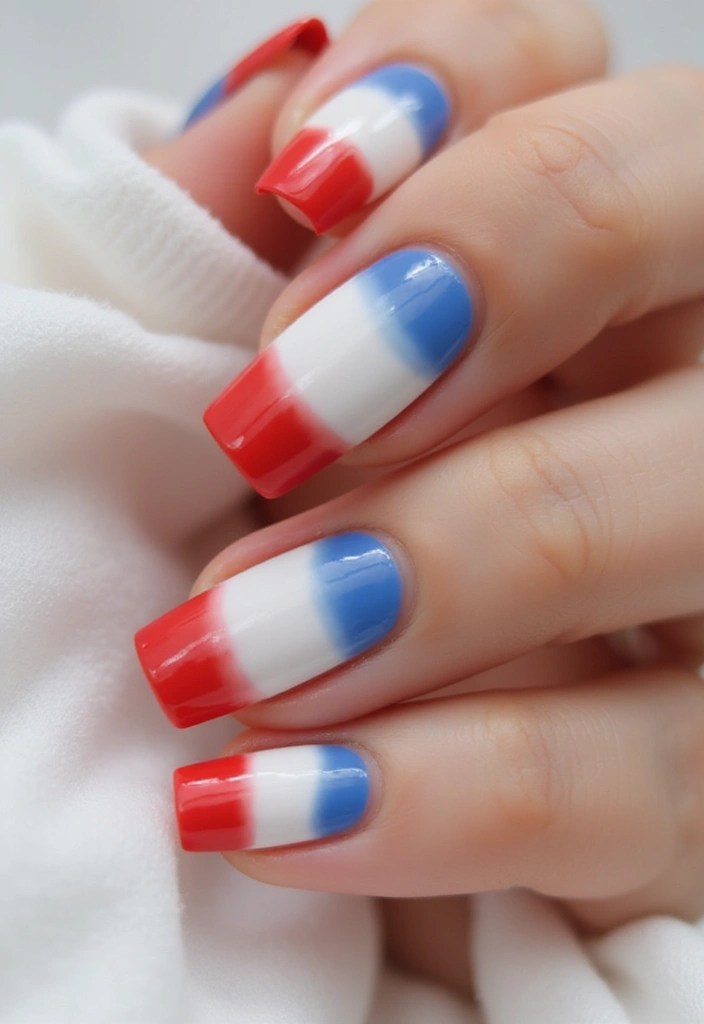
A gradient design is a chic way to show off your Independence Day spirit while keeping it modern!
Start with a white base and use a sponge to blend red at the tips and blue closer to the cuticle, creating a stunning ombre effect. The nail art sponge applicators are perfect for achieving this look, as they help you create that beautifully blended gradient without any harsh lines. Just make sure to blend the colors well on the sponge before applying for the best results. A little practice can lead to remarkable results!
To add an extra touch of sparkle, consider using silver glitter nail polish at the tips. This will give your nails a festive finish that shines bright. Finally, a matte topcoat can soften the final look, making it elegant and unique.
If you’re looking for the perfect colors, check out the red, white, and blue nail polish set, which features all the shades you need for this design. You can even try this design with different base colors for a unique twist!
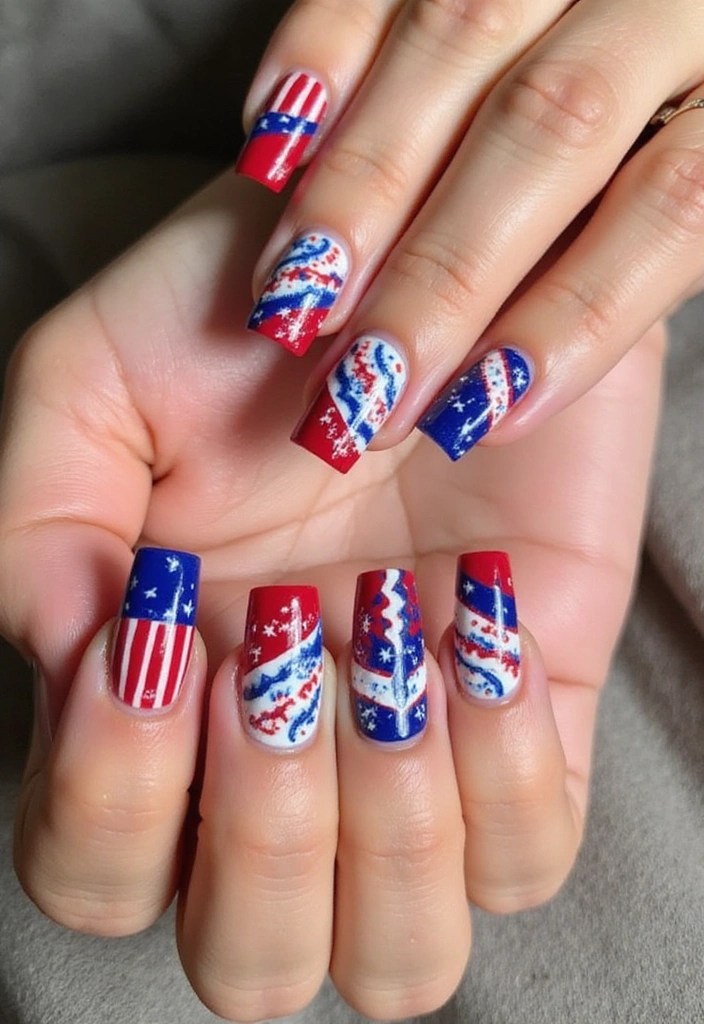
5. Stars and Stripes Combo
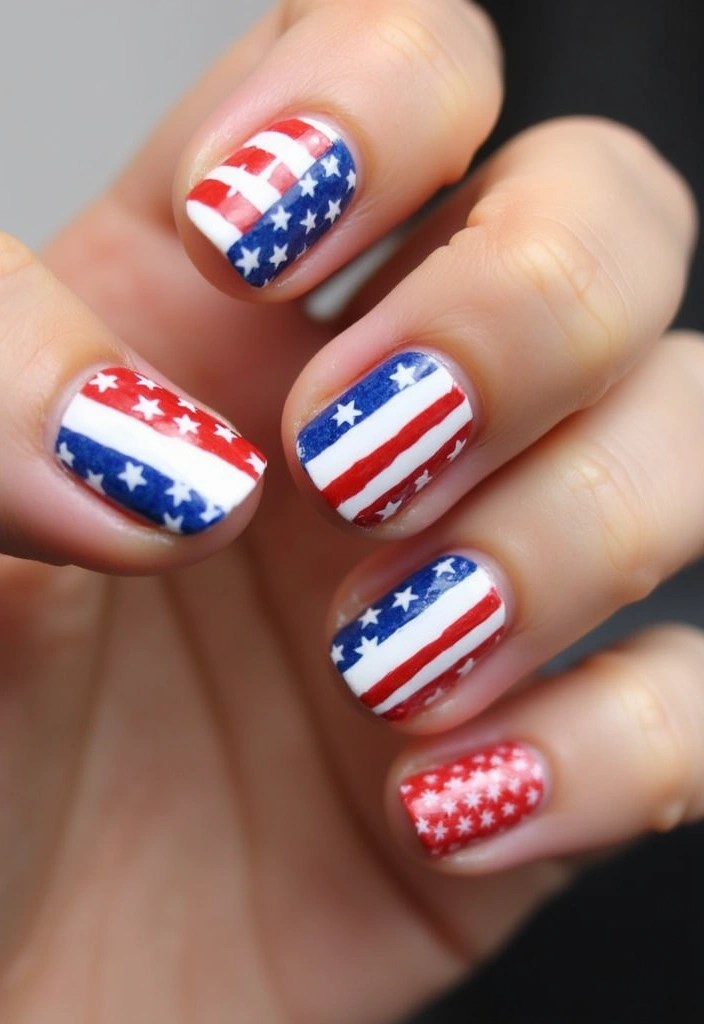
For those who can’t decide between stripes and stars, this combo design is perfect!
Paint a few nails with bold stripes and others with starry designs. You can opt for different patterns, like horizontal stripes on one nail and vertical on another, creating an exciting mix. Mixing designs is a fun way to express your creative side!
To achieve this look, you might want to consider using the Nail Art Brush Set. This set includes various brushes and dotting tools that make it easy to create fine details, whether you’re drawing stripes or stars.
Use a different base color for each design to make them stand out even more. For a classic red, white, and blue palette, the Nail Polish Set (Red, White, and Blue) is an excellent choice. This set features colors that pop and are perfect for Independence Day celebrations.
When it comes to the stripes, try contrasting colors like white on blue or red on white. You can also consider using different sizes of stars to add variety. To ensure your designs last and shine, finish with the Glossy Top Coat. This top coat will give your nails a beautiful shine and make all the details stand out.
With these tools and products, you’ll have everything you need to create a stunning stars and stripes combo that will make you shine this Independence Day!
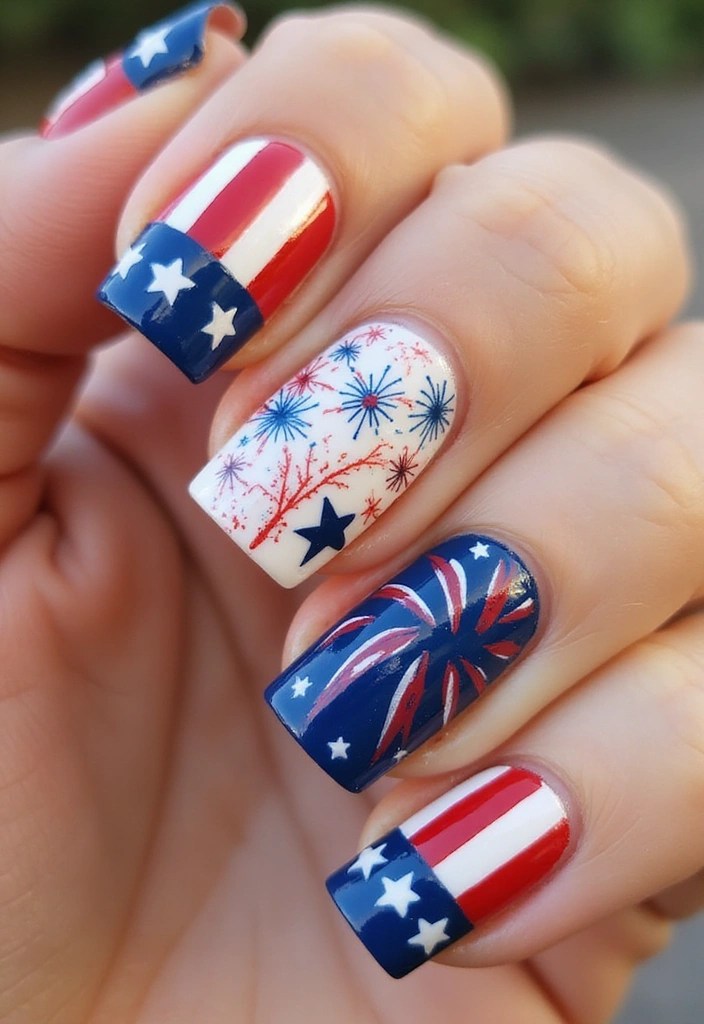
6. Glittering Flag
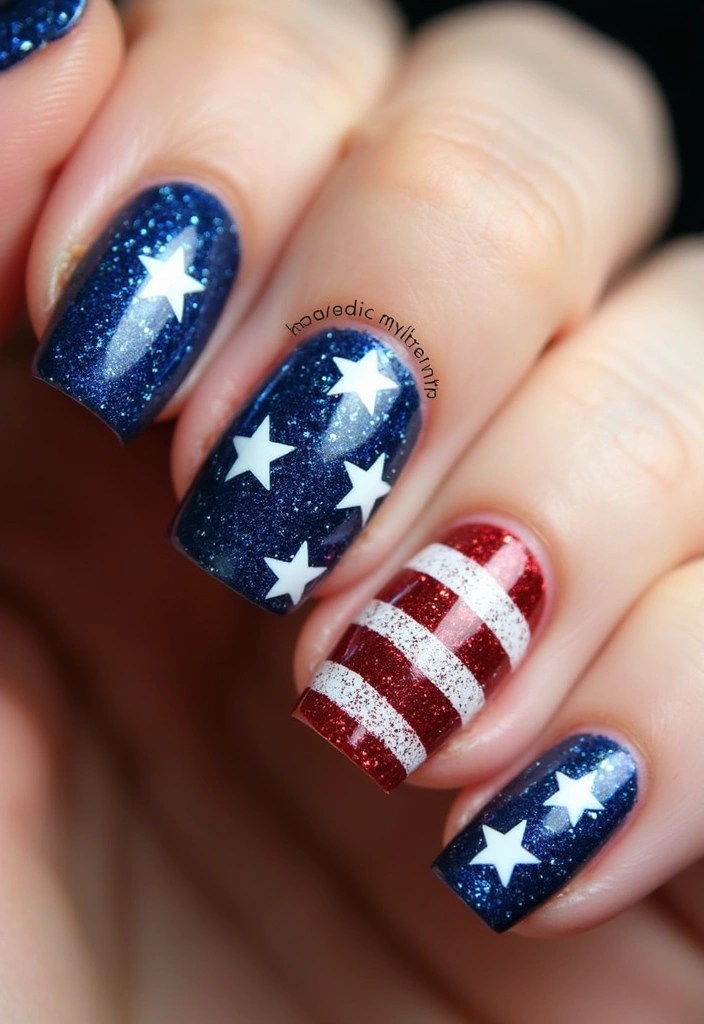
Nothing says patriotism like the American flag, and what better way to show it off than on your nails?
Create a design resembling the flag with a base of red and blue glitter using L.a. COLORS Color Craze Nail Polish, Glitter Bomb. This glitter nail polish set is perfect for achieving that dazzling look. To paint the stars and stripes, use white polish or glitter, and for precision, a small brush or dotting tool can be really helpful. Consider using a 5 pc 2 Way Dotting Pen Tool Nail Art Tip Dot Paint Manicure kit to effortlessly create those intricate details on your nails.
This eye-catching design is perfect for holiday celebrations and will sparkle under the festive lights! Don’t forget to mix fine glitter with chunky glitter for a dynamic look. If you want to keep things elegant, you can even recreate the flag on a single accent nail. Finally, make sure to seal everything with a strong top coat for longevity using OPI Nature Strong Natural Origin Nail Polish Top Coat, which provides a clear gel-like finish while being eco-friendly. This way, your festive nail art will stay vibrant throughout the celebrations!
7. Abstract Firework Splatter
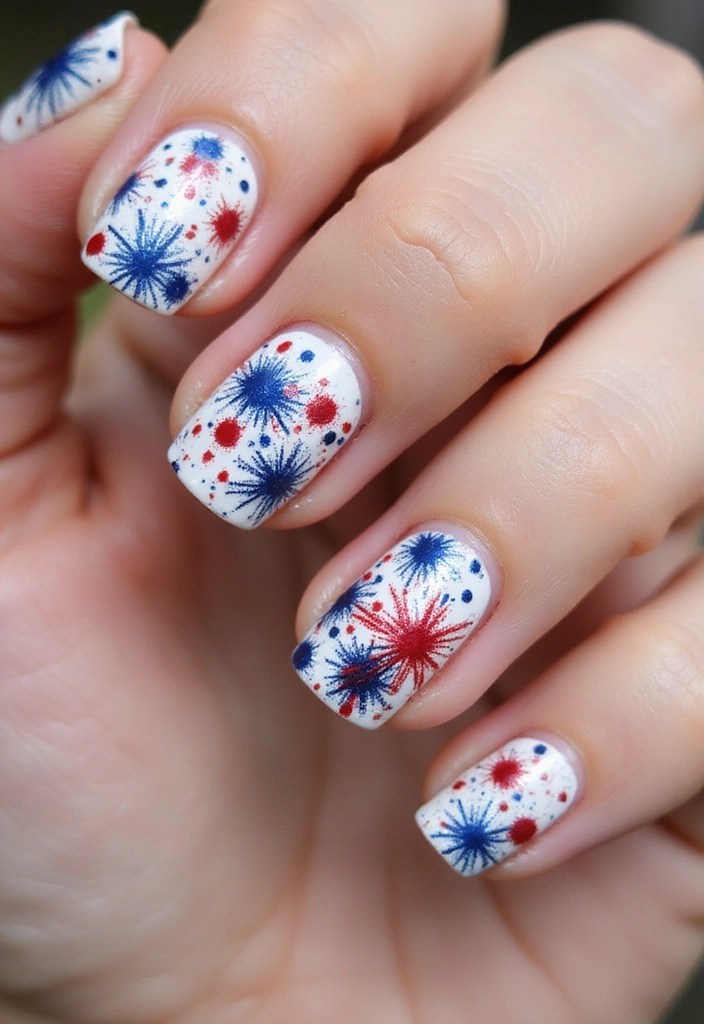
Go for an abstract approach to celebrate fireworks! Using a splatter technique gives your nails a unique, artsy flair.
Start with a white base and use a straw or a fan brush to flick red, white, and blue polishes onto your nails for an explosive and fun design. For this, you can use the red, white, and blue nail polish set, which features colors specifically curated for patriotic nail art. It’s a playful way to capture the essence of the holiday!
Before you begin, practice on a piece of paper to get the right flicking technique down. To help with your design, consider using the nail art brush set, which includes a variety of tools, perfect for achieving detailed splatter effects.
For an extra pop, think about adding some sequins or gems for a 3D effect. The nail art gems and sequins kit can provide you with all the decorative elements you need to elevate your design. Lastly, don’t forget to finish with a clear top coat to enhance shine and protect your intricate artwork.
You can create a few accent nails with different splatter patterns to keep it interesting and uniquely yours!
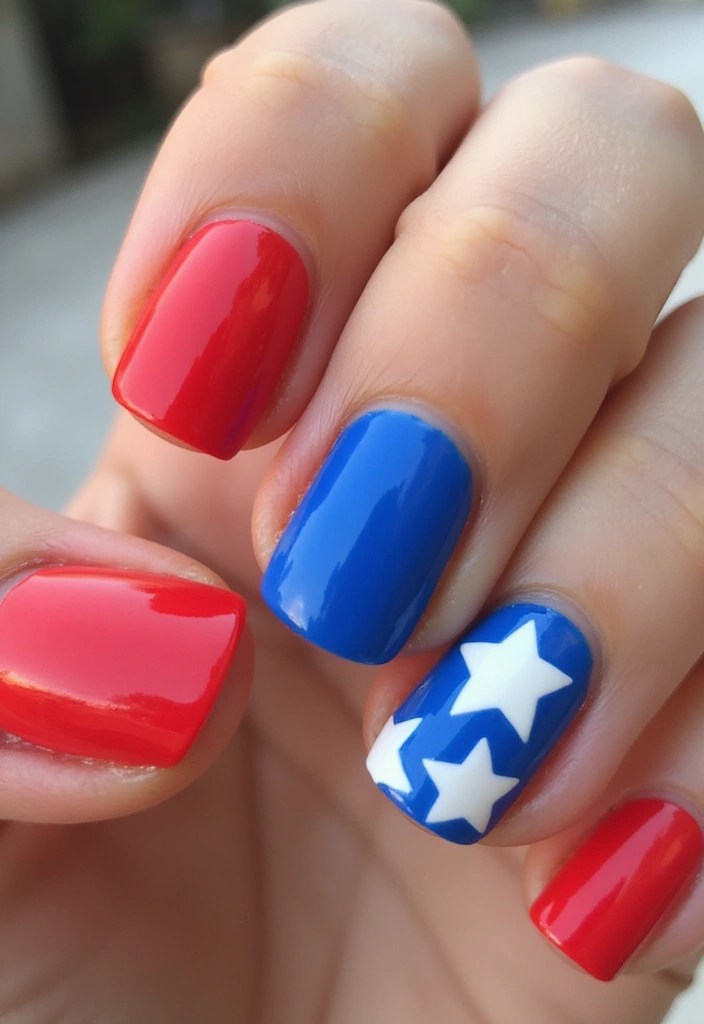
8. Stars on a Blue Field
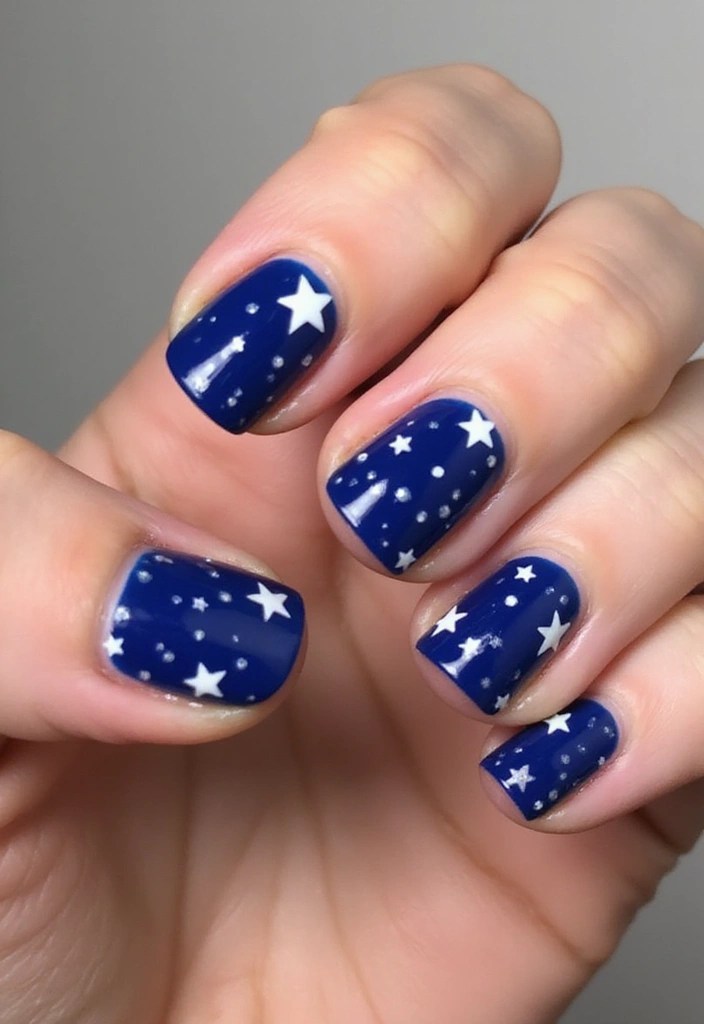
This design is simple yet impactful. A solid blue base with scattered white stars is a nod to the American flag and looks great for any Independence Day celebration.
To achieve this look, start by painting all your nails with a deep blue polish like Sally Hansen Hard as Nails, Sturdy Sapphire. This long-lasting polish is chip resistant and has a shiny finish that will make your stars pop. Once your base is dry, use a dotting tool, such as the white nail art dotting tool, to carefully add tiny white stars across your nails. For extra flair, consider using different sizes of stars or even adding some glitter with a top coat like Sally Hansen Hard as Nails Xtreme Wear, Disco Ball.
To complete the look, ensure your blue polish has a nice glossy finish to make the white stars stand out beautifully. You can also place a large star on an accent nail for a focal point, or add a matte top coat for a trendy twist. Enjoy showing off your festive nail art this Independence Day!
9. Red and Blue Dots
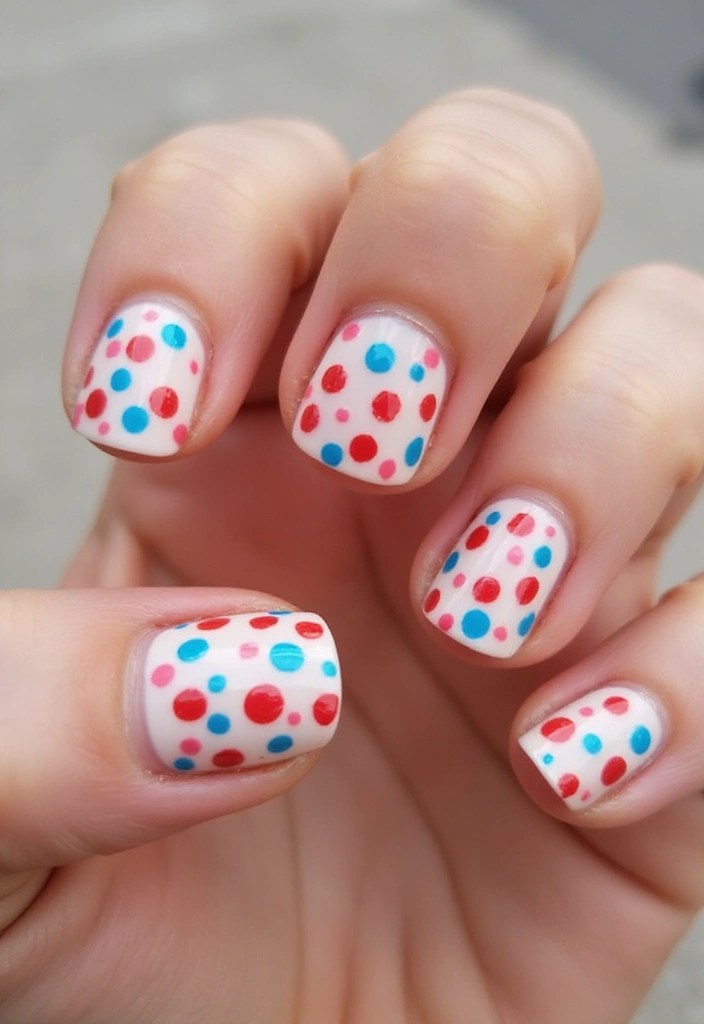
Polka dots are always in style, and they’re perfect for a fun Fourth of July look!
Choose a white or light base color and paint red and blue dots randomly or in an alternating pattern across your nails. This playful design is cheerful and easy to achieve, making it great for nail art beginners! To create those perfect dots, consider using a dotting tool set. With 10 pieces, including double-end dotting tools, you’ll have everything you need to make consistently sized dots with ease.
You can also elevate your nail art skills further with the nail art brush set. This 31-piece kit includes various brushes and dotting tools, giving you the versatility to mix in stripes or other designs for a more eclectic look.
Don’t forget to finish your masterpiece with a glossy finish! A layer of top coat nail polish not only provides a streak-free shine but also helps your art last longer, so you can show off your festive nails all day long.
10. American Spirit with Rhinestones

Elevate your patriotic nail art with some bling! Adding rhinestones can transform a simple design into a stunning statement. Start with a basic design, such as solid red, white, or blue, and enhance it with small rhinestones in the shape of stars or stripes for that sparkling touch.
To secure your rhinestones in place, use a strong top coat like Sally Hansen Double Duty™, Base and Top Coat. This quick-drying polish offers long-lasting, streak-free shine, ensuring your beautiful design stays intact.
For the rhinestones themselves, consider using a practical solution like nail rhinestone glue. This super strong gel is perfect for attaching your decorative gems and will keep them securely fastened throughout your celebrations.
To add an extra layer of flair, think about starting with a colorful base using L.a. COLORS Color Craze Nail Polish, Glitter Bomb. This dazzling glitter polish will make your design pop and provide a vibrant foundation for your rhinestones.
– Mix sizes and colors of rhinestones to create a unique pattern.
– For a more subtle sparkle, try placing rhinestones only on accent nails.
With these tips and products, you’re sure to shine this Independence Day!
11. Watercolor Stars
For a dreamy effect, try watercolor-style nails with stars! This artistic approach creates a soft look that’s still very much in the spirit of the 4th of July.
Start with a light blue base and use a subtle watercolor technique to create star shapes with red and white polish. Here, having the right tools is essential. A great option is the Nail Art Brush Set, which includes a variety of brushes and pens to help you achieve precise and beautiful designs.
To blend your colors for that gentle wash effect, consider the Watercolor Nail Polish Set. This blooming gel polish allows for a natural, artistic spread that mimics the soft watercolor style beautifully. Just remember to work quickly to prevent the polish from drying too much while blending.
For an extra touch of sparkle, add a bit of glitter polish. The Glitter Nail Polish by Sally Hansen is perfect for this, as it dries quickly and adds a festive shimmer to your nails.
If you’re looking for a modern twist, finish your design with a matte topcoat to really make those colors pop. Don’t hesitate to experiment with different color combinations for a unique take on this festive nail art!
12. Tie-Dye Patriot
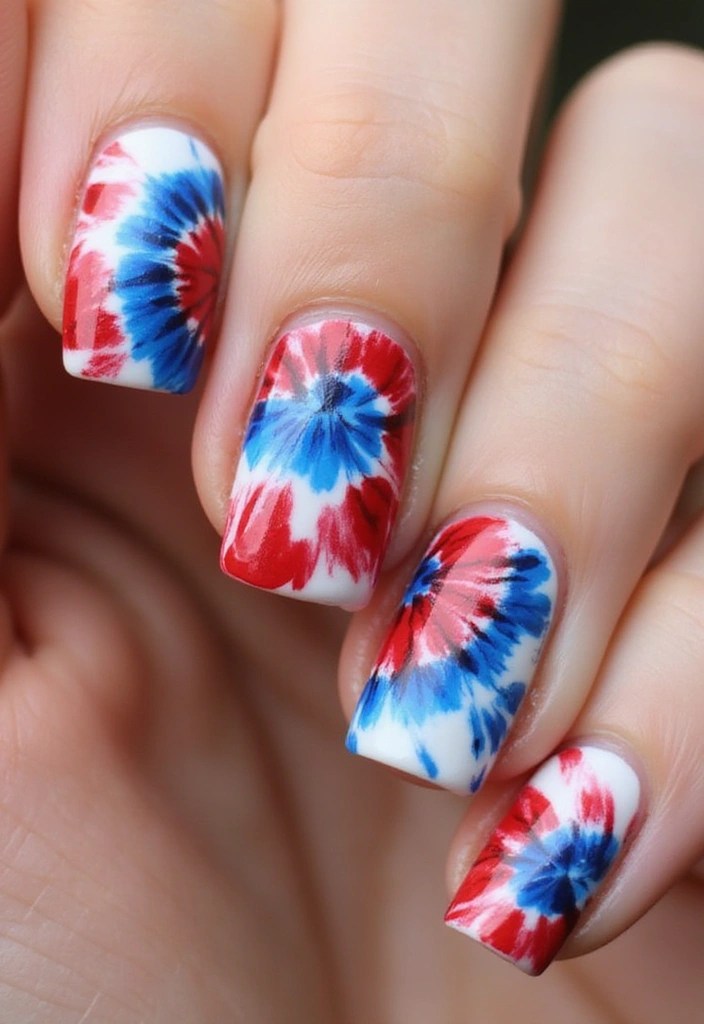
Put a twist on traditional designs with a tie-dye effect! This fun and funky style combines patriotism with a splash of creativity.
Start with a white base, then use a sponge to dab red and blue in a swirling pattern. A great option for this technique is the Nail Art Sponge Applicators. Using a sponge helps achieve that vibrant tie-dye effect, perfect for summer celebrations, while ensuring you have a soft and even application.
Make sure to use a light hand while applying to avoid too much color overload. To add a trendy finish, consider incorporating a matte topcoat like the Matte Top Coat Nail Polish. This product not only enhances the overall look but also adds a chic matte finish to your nails.
If you want to create more defined swirls, a great tool to have on hand is the Nail Art Dotting Tools. These tools are perfect for detailing and can help you achieve those intricate patterns that truly stand out.
With the right tools and techniques, your tie-dye nails will be a hit this Independence Day!
13. Minimalist Flag Lines
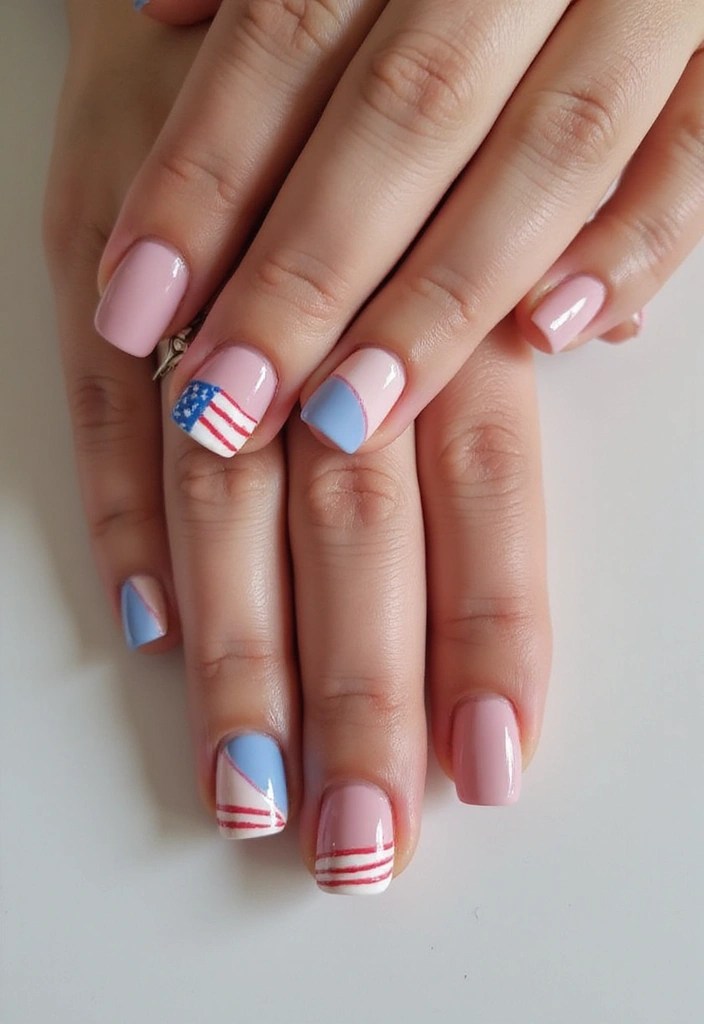
Keep it chic and simple with minimalist flag lines. This design is understated yet shows your Independence Day spirit with elegance.
To achieve this look, start by painting your nails with a light color, such as pastel shades of red or blue. For the straight lines that mimic the flag, you can use striping tape for nail art. With this handy kit, you’ll find various widths of tape that allow you to create clean, straight lines effortlessly. It’s perfect for achieving that subtle interpretation of the classic stars and stripes look.
Once you’ve added the lines, finish off with matte top coat nail polish for an elegant matte finish. This will elevate the design while providing a smooth, sophisticated look.
For those who want to add a touch of glamour, consider incorporating a few metallic accents with the metallic nail polish. With its shiny chrome effect, it will catch the light beautifully and complement the overall design.
This minimalist flag lines nail art is perfect for anyone who appreciates simplicity yet wants to express their festive spirit.
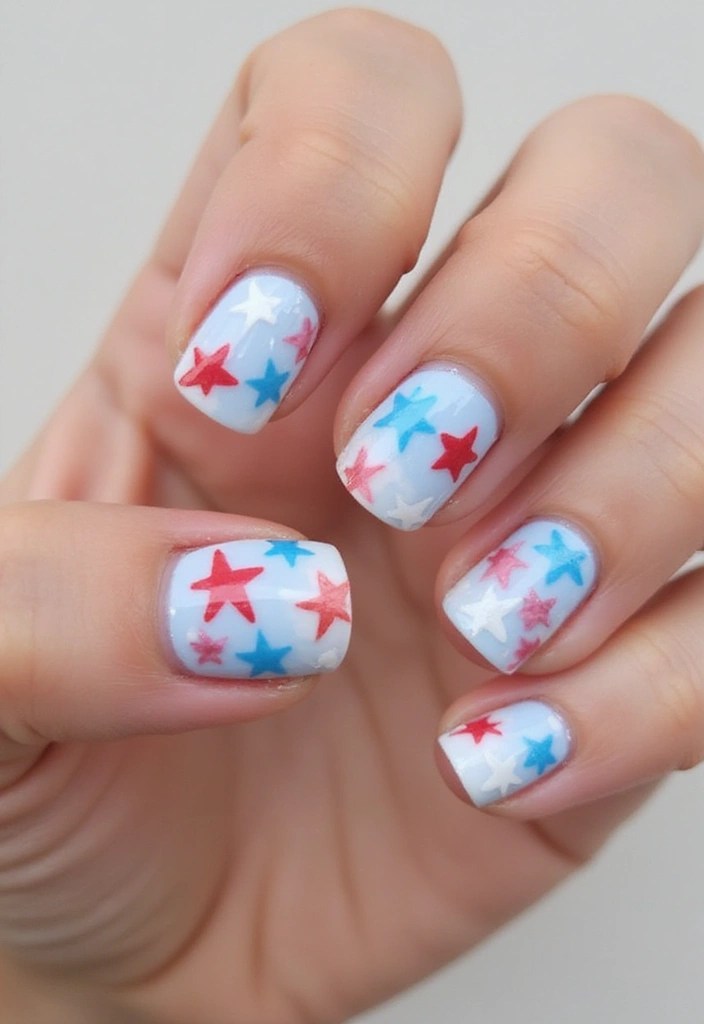
14. Bold and Bright Stars
For those who love bright colors, this design is for you! A bold color palette featuring vibrant red, blue, and white will make your nails pop.
Paint each nail a different color and use bright white polish to paint oversized stars on a couple of accent nails. This playful and vibrant design will surely capture attention at any Independence Day gathering! To make the process easier, consider using a nail art brush set that includes dotting tools and striping liners, allowing you to create precise star shapes with ease.
Ensure the polishes are fully dry before adding stars to avoid smudging. For a fun twist at night, think about using a glow-in-the-dark nail polish, like the Insta-Dri Glos-sea. This way, your nails will shine bright even after the sun goes down!
Don’t forget to add a coat of clear glitter nail polish for some extra sparkle. Mixing colors with different finishes can enhance the overall effect and give your nails an extra depth that will be sure to impress.
15. Independence Day Characters
Why not add a little fun with cute character designs? Paint small, cartoonish elements like Uncle Sam hats, fireworks, or even American bald eagles on your nails. This design allows for creativity and individuality, making your nails a canvas for your love of the holiday!
To achieve these playful designs, consider using the fine detail nail art brush set. These brushes are perfect for adding fine details to your character designs without overwhelming your nails. Keep the designs small and simple, as intricate details can be tricky to manage.
For a longer-lasting finish, opt for the gel nail polish set. This set includes a no wipe gel top coat and base coat that will help your artwork shine bright throughout the holiday celebrations.
If you’re looking for an even easier option, the patriotic nail art stickers provide a fun, hassle-free way to add festive designs to your nails without needing extensive painting skills. Choose a few characters to focus on, and you’ll be showing off your holiday spirit in no time!
16. Red and White Marble
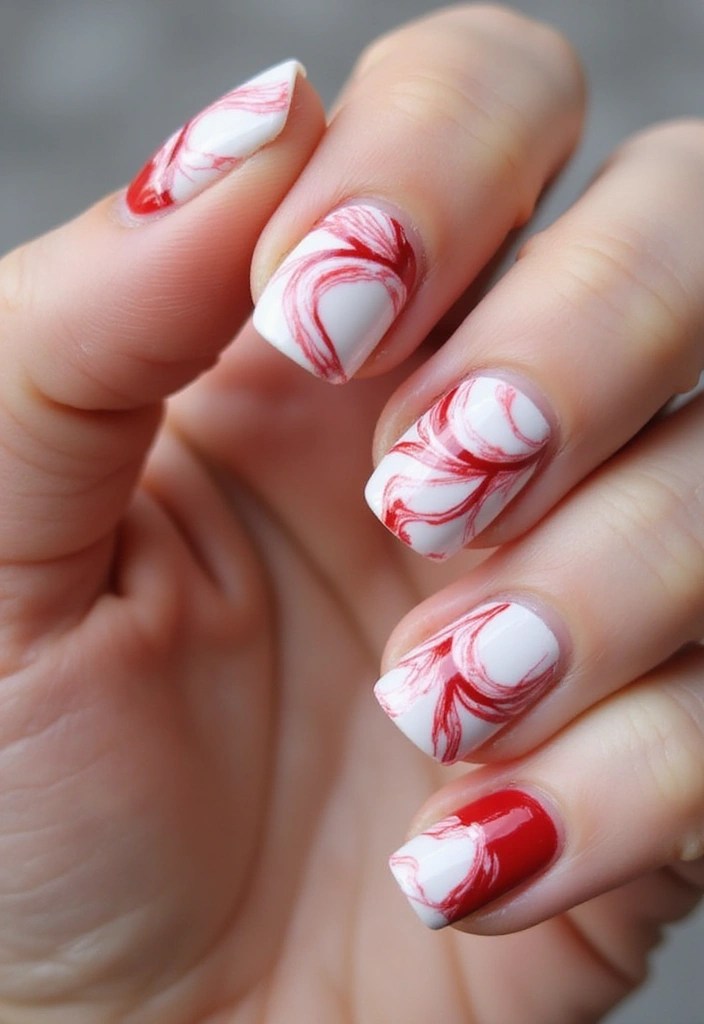
Marble nails are chic, and when you add red and white, you get a stunning patriotic twist!
Begin with a base of white polish using a high-quality polish from the Red and White Nail Polish Set that features vibrant shades perfect for the holiday. Next, create the marble effect using a red polish and a small brush or a straw to swirl the colors together. The Nail Art Brush Set is ideal for this project, as it includes various tools to help you achieve the perfect marbling technique.
This is a stylish way to celebrate the holiday while looking sophisticated. Don’t forget to finish off your design with Top Coat Nail Polish to add shine and longevity to your look.
– Experiment with the thickness of the swirls for different effects.
– Consider a lighter base with darker marbling for contrast.
– Mix in a touch of blue for a more vibrant look.
17. Funky Geometric Patterns

Step out of the box with funky geometric patterns! This modern design utilizes triangles, squares, and lines in red, white, and blue to create a striking look. You can paint different geometric shapes on each nail for a unique appearance or keep the same design throughout for a cohesive style. This artistic touch is sure to turn heads!
To achieve clean lines and shapes, consider using nail art tape. It helps you create sharp edges and precise patterns, making your nail art look professional.
Don’t hesitate to play with negative space for a trendy effect and experiment with different color placements for a bold statement. After you’ve perfected your design, sealing it with top coat nail polish ensures a quick-dry, long-lasting finish that delivers a streak-free shine.
For those who want to delve deeper into their creativity, a nail art brush set can be incredibly helpful. It includes various brushes and tools that allow for intricate designs and details. With these tools at your disposal, your funky geometric nail art will truly shine!
18. Sunshine and Fireworks
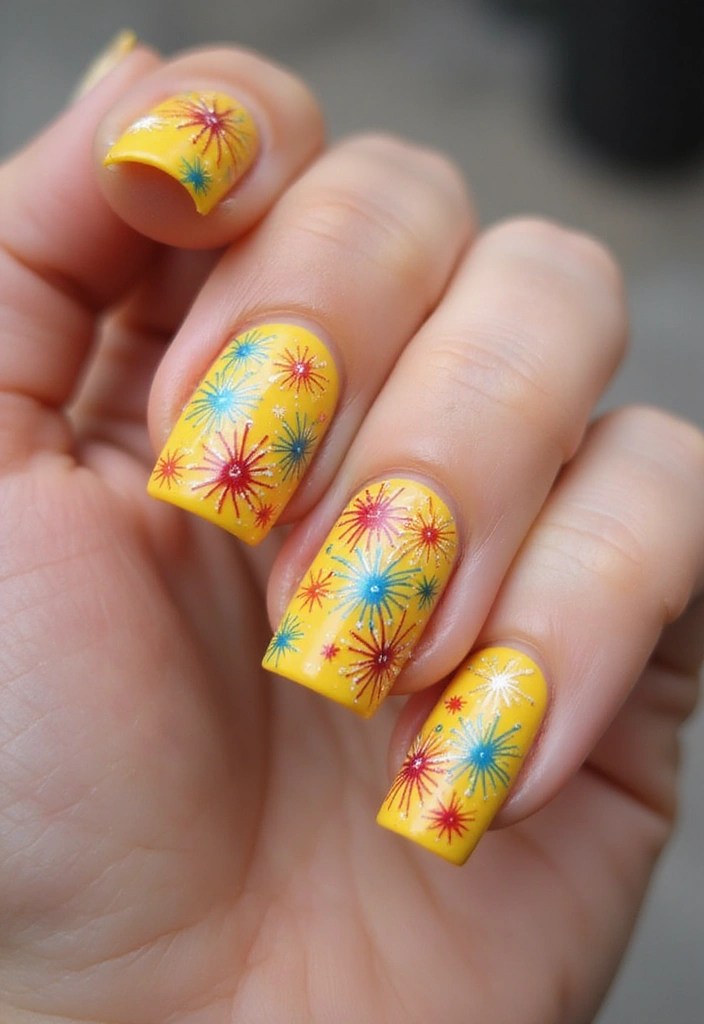
Combine the warm essence of summer with festive fireworks! Start with a bright yellow base using bright yellow nail polish to represent the sun. This vibrant color will set the perfect backdrop for your design.
Next, create colorful fireworks popping against this sunny base. Use a fine brush or nail art pens set for more control in depicting fun bursts of red, blue, and white. This will ensure your fireworks are lively and eye-catching, embodying the cheerful vibes of a July 4th celebration.
To complete your look, apply a glossy top coat for a shiny finish that enhances the sunny vibe of your nail art.
– Keep the colors bright for a summer feel.
– Try a sun motif on an accent nail.
– Have fun and enjoy the creativity of your festive nail design!
19. Bold Tribal Patterns
Give your nails a unique flair with tribal patterns inspired by the colors of the American flag! These designs can be bold and intricate, allowing you to express your independence in a stylish way.
Start by using a detailed brush like the Nail Art Brush Set to create various shapes and lines in red, white, and blue. This set includes fine brushes perfect for achieving those detailed tribal designs. You can keep the pattern consistent across different nails or create a mix for an eclectic feel.
To enhance the tribal vibe, opt for a matte finish with a product like the Matte Top Coat Nail Polish. This top coat not only provides a sleek matte look but is also quick-drying and chip resistant, ensuring your manicure lasts through all your Independence Day celebrations.
For the colors, consider the Red, White, and Blue Nail Polish Set. These gel polishes are hema-free and soak off easily, making them perfect for creating vibrant designs. You can even experiment with combining these colors on other nails for a balanced yet striking appearance.
If you want to add a touch of elegance, try incorporating some gold accents into your design. With the right products and a bit of creativity, your nails will shine as brightly as your spirit this Independence Day!
20. Seasonal Flowers
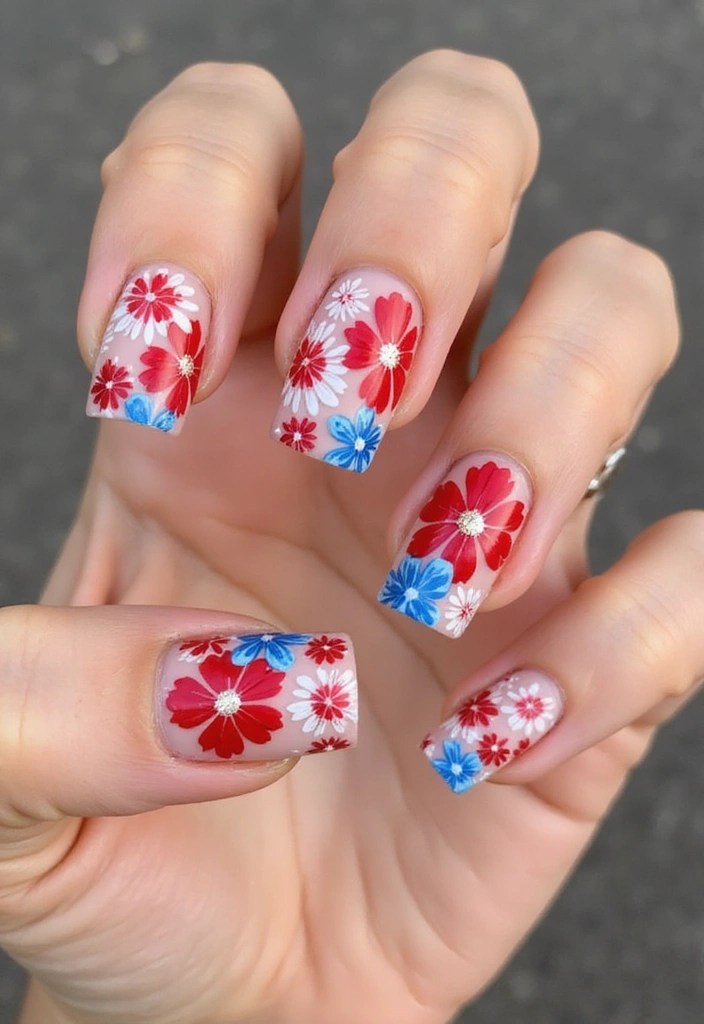
Flowers in patriotic colors can add a fun, seasonal touch to your nails!
To create a delightful floral design, use red and blue flowers with white accents on a neutral background. This design strikes the perfect balance between playful and sophisticated, making it ideal for Independence Day celebrations.
For intricate designs, a good set of tools is essential. Consider using the Nail Art Brush Set, which includes fine brushes and dotting tools. These will help you create detailed flower designs easily.
Mixing flowers and vines can add extra interest to your nail art. You might also want to try different flower sizes for a more dynamic look. To ensure your design stands out, finish with a glossy top coat like the Glossy Top Coat. This clear top coat gel not only provides a long-lasting glossy finish but also enhances the overall appearance of your manicure.
If you prefer drawing with pens, the Nail Art Pens can be a great choice. With their fine tips, these pens allow for quick and precise painting, ensuring that your floral designs come out beautifully.
With the right tools and a bit of creativity, your nails will shine brightly this Independence Day!
21. Spangled Glitter Accent
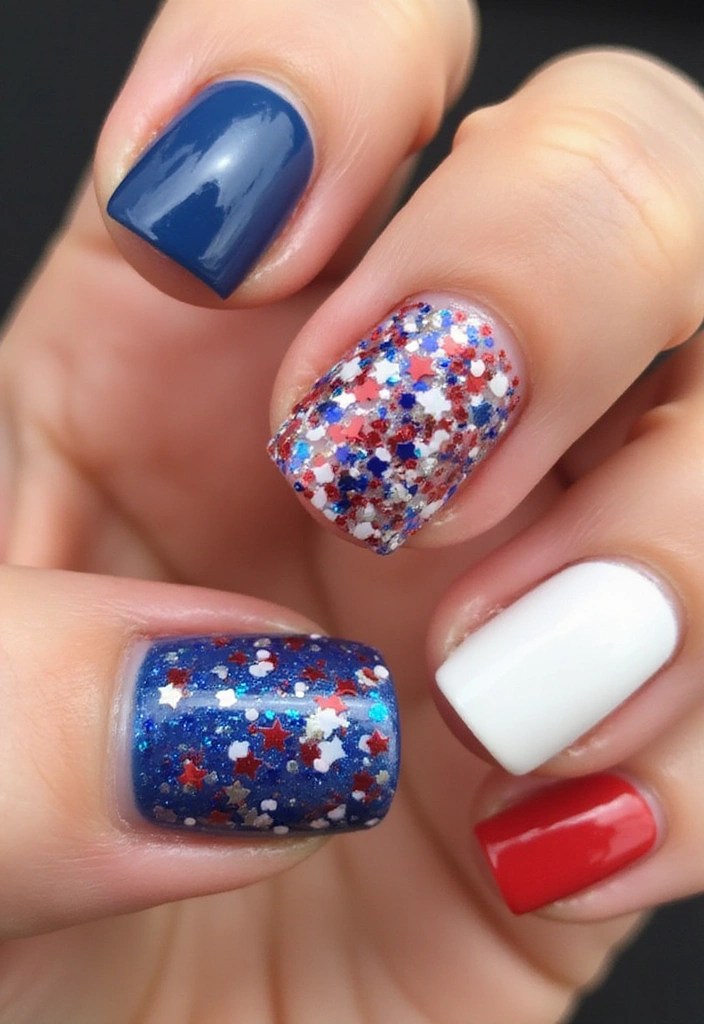
Go bold with an accent nail featuring spangled glitter! Choose one nail on each hand to be adorned with a mix of red, white, and blue glitter using a nail glitter set – red, white, and blue. The rest of the nails can remain simple with a solid color to balance. This design allows for a fun factor while keeping it classy!
To ensure the glitter holds well, start with a strong base by applying base coat and top coat nail polish. This quick-drying, long-lasting formula will create the perfect foundation for your glitter and help seal your design for longevity.
For added creativity, consider using different sizes of glitter particles from your glitter set to create a gradient effect, giving your nails stunning visual depth. To achieve intricate designs and fine details, a nail art brush set can be incredibly helpful, allowing for precise application and artistic flair. Finish with a top coat to ensure your spangled sparkle lasts, and enjoy your festive look!
22. Twinkling Stars and Stripes
Mix the classic stars and stripes with a twinkling effect for a magical look!
Start by painting your nails with alternating red and white stripes. To create that enchanting twinkling effect, add tiny dots of glitter, especially on the white stripes. A dark blue base on select nails will provide a lovely contrast! For precision in applying glitter, using a nail dotting tool set will make the process much easier. This kit includes both double-end dotting tools and nail art liner brushes, perfect for intricate designs.
Experiment with different types of glitter to achieve varied effects—consider using glitter nail polish for added flair. Its convenience allows you to easily incorporate sparkle into your nail art.
To finish off your look, use a matte top coat nail polish on the stripes. This trendy twist not only gives a sophisticated finish but also helps to keep your design looking polished and intact.
Remember to keep your stripes even for the best results, and let your creativity shine this Independence Day!
23. Neon Patriotic
For those who love bold colors, try a neon patriotic design! Use electric shades of red and blue with white accents for a super vibrant look. This design is perfect for anyone wanting to stand out in a crowd! Create abstract shapes or use stripes and dots for an electric feel.
To achieve the dazzling neon effect, consider using the Born Pretty Neon Nail Polish Set. With six bright colors, this quick-dry nail polish set will help you create those eye-catching designs.
Make sure to apply a strong top coat for longevity, as neon polishes can chip easily. The Sally Hansen Double Duty™, Base and Top Coat provides a quick-dry, long-lasting finish that delivers streak-free shine, enhancing the vibrant look of your nails.
Additionally, mix matte and glossy finishes for depth and use a black base to bring out the neon more. For added fun, experiment with nail art stickers to incorporate playful designs into your nail art, elevating your style even further. Enjoy your festive, creative nail art this Independence Day!
24. Iconic Eagle Design
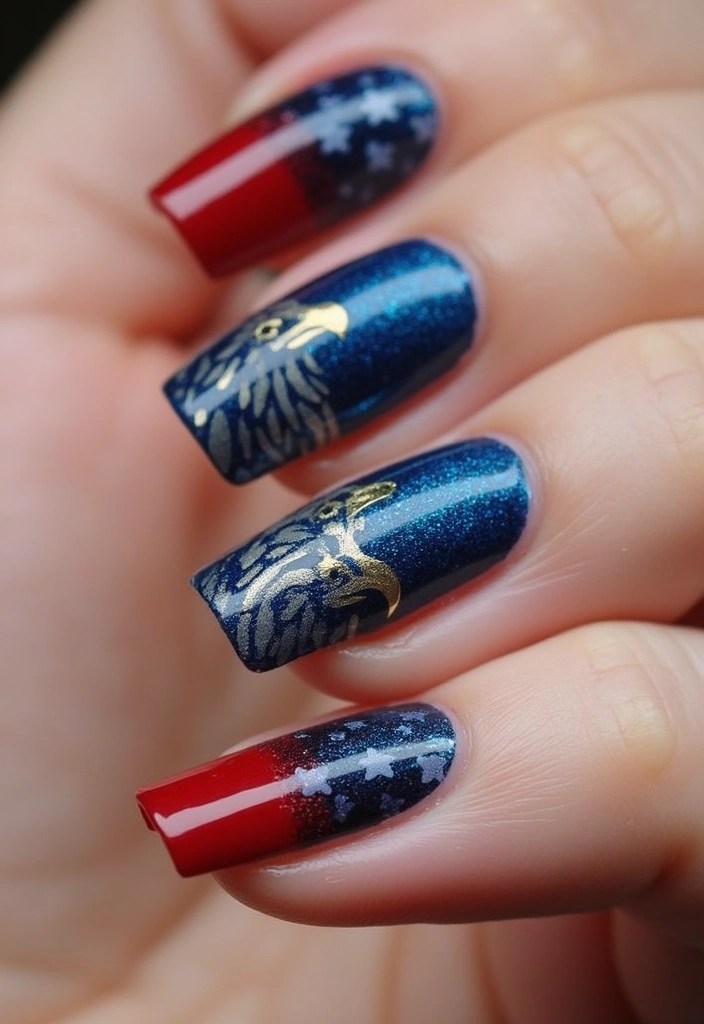
Show off your patriotic pride with an eagle design! Start by painting your nails a solid blue or crimson base. For the eagle silhouette on one or two accent nails, use Sally Hansen Xtreme Wear, White on, which delivers long-lasting, chip-resistant color, perfect for intricate designs. This design is elegant and embodies the spirit of freedom.
For more detailed work, a nail art brush set is essential. It includes fine brushes and dotting tools that give you precision when creating the eagle silhouette.
Keep the rest of the nails simple to let the eagle stand out, and consider adding a glittery base for an extra touch. For that, you can use nail art pens. These pens offer great control and are perfect for adding those sparkling details that will make your design truly pop.
25. Minimalist Red, White, and Blue
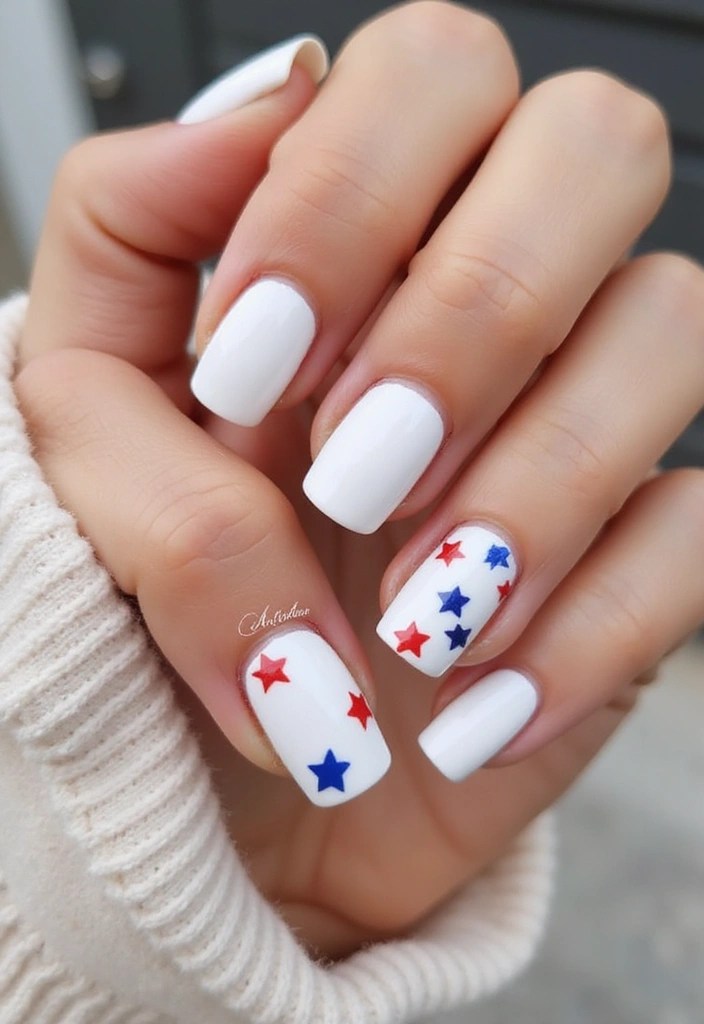
Wrap up your nail art journey with minimalist red, white, and blue designs. Choose a clean white base and add small red and blue dots, lines, or geometric shapes for a modern take on patriotism. This design is subtle yet stylish, perfect for those who prefer a minimalist aesthetic.
To achieve this look, consider using nail art dotting tools for precision when applying your dots and lines. They make it easy to create uniform shapes and maintain a polished effect.
For the final touch, a matte finish can truly make the colors pop! The matte top coat nail polish is perfect for achieving that sleek, modern look while also adding durability to your design.
Additionally, to get the ideal colors, check out the red, white, and blue nail polish set. This kit includes a variety of shades that are quick-drying and long-lasting, allowing you to explore different styles on different fingers for added interest.
Keep your designs simple and aligned, and with these products, you’ll enjoy a stunning patriotic manicure that will shine this Independence Day!
Conclusion

With these 25 creative patriotic nail art ideas, you’ll surely find the perfect design to show off your Independence Day spirit!
Whether you prefer bold colors, intricate patterns, or minimalist styles, there’s something here for everyone.
Celebrate this Fourth of July with your unique twist on nail art and let your creativity shine bright!
Note: We aim to provide accurate product links, but some may occasionally expire or become unavailable. If this happens, please search directly on Amazon for the product or a suitable alternative.
This post contains Amazon affiliate links, meaning I may earn a small commission if you purchase through my links, at no extra cost to you.
Frequently Asked Questions
What are some easy patriotic nail art designs?
Classic red, white, and blue stripes or polka dots are simple yet festive options. These designs require minimal tools and are perfect for beginners!
How can I make my nail art last longer?
Use a good quality base coat and top coat to protect your design. Avoid prolonged exposure to water and chemicals to maintain your festive look.
What colors should I use for 4th of July nail art?
Stick to bold red, white, and blue shades, but feel free to incorporate glitter for extra sparkle! These colors will perfectly capture the Independence Day spirit.
Can I do patriotic nail art at home?
Absolutely! Most designs can be easily replicated at home with basic nail polish and tools. Just follow the step-by-step guides for best results.
Do I need special tools for patriotic nail art?
Basic tools like nail polish brushes, dotting tools, and sponges are usually sufficient. You can even use household items for creative techniques!

Leave a comment